How to Create a Cat 6 Patch Cable

by http://www.fiber-mart.com

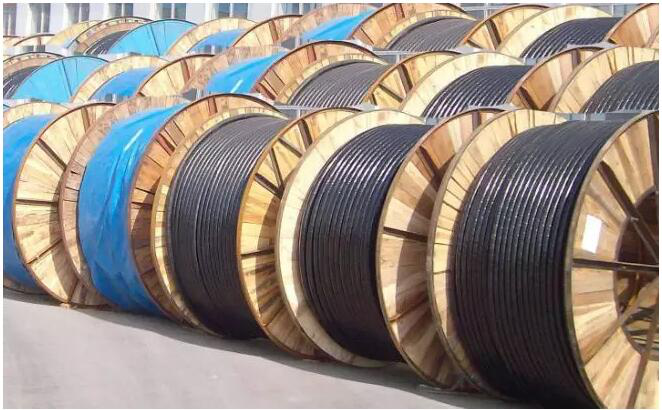
Cat 6 cable (listed in the standard as Category 6) is a standardized cable for 1000GBASE-T (Gigabit Ethernet) that is backward compatible with Category 5/5E and Category 3. It is also suitable for 10GBASE-T (10-Gigabit Ethernet), 10BASE-T, and 100 BASE-TX (Fast Ethernet). New installations often specify Cat 6 cable. It is important for professional installers to understand the requirements of the newer standard and know how to create a standard cat 6 patch cable.
Differences With Cat 5 Cable
Whereas Cat5E cable is only characterized up to 350 MHz, Cat 6 allows up to 550 MHz operation. The greatest performance improvement for Category 6 cable is its increased immunity to alien crosstalk. This type of crosstalk is coupling between nearby connections. In some cases, users can hear other people’s conversations on their line, thus the term crosstalk. The biggest foil to crosstalk is that the 8 cable wires are matched in sets of 4 twisted pairs. Each pair is fed differentially, and common-mode signals (signals which are the same on both wires, such as crosstalk coupling) are rejected. A second technique for reducing crosstalk is to use digital signals, which are inherently resistant.
Physical Characteristics
It is easy to differentiate Category 6 cable by the printing on the side of the sheath. Connectors use either TIA standard T568A or T568B pin assignments. Some technicians get away with alternate configurations. This works as long as both ends of the cable are connected the same way. However, it is not a recommended practice in case another technician comes in to repair one end of the cable later.
Although Cat 6 connectors have the same 8P8C look as Cat 5E and other earlier versions, it is important to use cat 6 rated jacks, connectors, and cables, or the improved Category 6 performance will be degraded.
Installation Caveats
In order to meet Cat 6 specs, installation is everything. Make sure not to kink the cable. This can happen if the bend radius is less than four times the cable diameter. A common installation mistake is to strip the insulation back more than 0.5 in (12.7 mm). Another common problem is allowing the twisted pairs to unravel past the skin point, creating a crosstalk vulnerability point at the connector.
High EMI (electromagnetic interference) environments require special handling. This type of environment may occur when cabling is within a few feet of a power plant, a high power electric motor, high power switches, or other heavy EMI generators. Cable shielding preserves the Category 6 specs and is enhanced by connecting to a drain wire. This wire runs through the actual cable alongside the groups of twisted pairs.
According to Cat 6 directives, the cable shielding is connected to true ground at each cable end through jacks. Unfortunately, this violates the rule of only grounding one side of a shield in order to avoid creating a ground loop. Installers must be careful to place each cable to avoid having a voltage differential from one end of the cable to the other. If this happens, extraneous currents may be generated in the cable, increasing system noise.
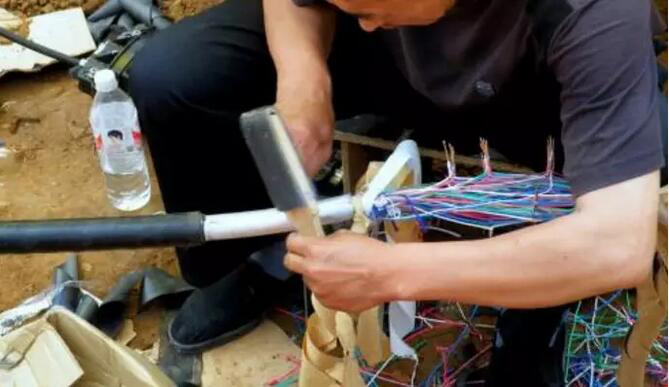
How to Make a Patch Cable
Start by assembling the proper tools:
• Category 6 cutter/stripper
• Plugs – these are different for stranded or solid connectors. They are nearly impossible to differentiate visually, so be sure to keep them separate after you make the purchase.
• Crimper
• Boots (optional)
Cat6 Crimp ToolNow complete the following steps:
• Cut the cable to length and strip to 0.5”. Use the boots facing outwards, if desired.
• Carefully untwist the cable pairs – do not go further than the strip.
• Bend the center spine away from the conductor wires and cut at the strip.
• Bring the wires together and cut at a sharp angle.
• Bring the wires together and insert them into the loadbar. Use a 568B wiring diagram. (For a crossover cable, follow the 568A wiring diagram at one end only.)
• Check the wire order one more time, and then make a perfectly straight cut 0.25” past the loadbar.
• Place the connector onto the loadbar assembly. Make sure the copper connectors are up and the locking clip is facing down.
• Make the crimp, squeezing all the way down.
• Repeat the procedure at the other end.
Test the Assembly
Be sure to perform a continuity check religiously with each cable assembly. Consider using a high-quality four-pair tester. If the cable fails, try giving another crimp at each end. If necessary, check the wires by color for the proper positioning. Make sure each wire extends to the connector end and that the pins are pushed down fully. If it still does not work, clip off one connector and try again. If there is still a problem, repeat the examination, focusing in on the end with the original connector. Finally, high-performance 10GBASE-T will need to be tested in situ for alien crosstalk.
If we at FireFold can help in any way, please do not hesitate to contact us.

Don’t Tell Us Connector Cleaning Does not Matter!

by http://www.fiber-mart.com

A high-performance fiber optic network requires low attenuation and low reflectance values to obtain the necessary bit error rate level. Unfortunately, all it takes is one contaminated or damaged connector to slow down or disrupt a transmission system.

In the images below, see how cleaning connectors significantly reduces insertion loss and reflectance and the effects of cross contamination.

Cleaning Makes a Difference!

These two dirty connectors are not an uncommon thing! We mated them ‘as is’ and tested for insertion loss and reflectance.

We then cleaned the connectors with a dry one-click cleaner, mated them again, and ran the same test. Connector images and results have improved dramatically.

Contamination from a Dirty Test Lead

Below is a clean connector – one end of your link where you’ll connect your test cord for optical loss testing.

This could be a test lead that someone carries around in their test equipment bag or tool kit. The technician may have lost the dust cap or even wiped it on their shirt. They plug that test lead in and mate it to your clean connector.

Ouch! See what your clean, undamaged connector looks like now? Cross-contaminated by the dirty test lead!

It is important to recognize the difference between contaminants and end face damage. To do so requires a good inspection scope with the digital video ones being the safest and most versatile. Inspecting and cleaning both ferrules and adapters is essential as cross contamination from one dirty plug can contaminate its mating plug.

OTDRs Never Go Out of Style

by http://www.fiber-mart.com

The optical time domain reflectometer (OTDR) is now thirty-six years old and aging gracefully.

While fiber optic cables had been installed in North America since 1977, one major concern was and still is: how do we accurately locate a fault? This is the major reason that OTDRs exist. Fortunately, as the communications industry has matured, so has the OTDR.

Why Use It?

Today’s OTDRs address quality control (QC), quality assurance (QA) for optical fibers and cables as well as acceptance testing and troubleshooting installed links in the field. Fiber and cable manufacturers make use of the OTDR’s QC features to perform attenuation and length measurements at a variety of wavelengths based on the type of fiber being tested. These tests are more common in factory settings, often in conjunction with optical switches to allow quick and efficient testing of large numbers of optical fibers.

As fiber counts in cables have increased, the level of automation has paralleled this growth, providing opportunities to increase the OTDR’s value to service providers by incorporating optical switches to monitor live and dark fibers.

The OTDR’s dominant role for service providers and contractors is in QA roles — which is far more extensive and complex than QC testing. Modern OTDRs must address multiple tests and measurement tasks focused mostly around attenuation, but as the critical nature of reflections and their impact on system performance increase, the OTDR is essential for these measurements. It must also be able to perform length measurements for approximate physical locations of events such as splices, fiber stress points (macrobends and microbends), passive devices such as splitters and fiber breaks.

The OTDR is also the easiest instrument to use to measure component reflectance and span optical return loss (ORL) values. The importance of reflection testing cannot be overstated. Reflectance and ORL values are critical for achieving desired bit error rates, as Fresnel reflections from connectors can disrupt the efficient operation of the laser diodes in fiber optic transmitters.

Transmitter manufacturers define the quality of signal based on the level of attenuation and the ORL values for fiber spans. A single contaminated connector can affect the component reflectance, which in turn affects the span’s ORL value. Component reflectance and ORL testing should be requirements for all end-to-end OTDR tests on single-mode fibers.

New Challenges

As system data rates increase, the need for fiber characterization (FC) continues to challenge the industry. In some cases where optical amplifiers are installed, identifying, locating and re-terminating high-loss connectors and splices is required due to higher reflection and attenuation issues with legacy terminations. Older terminations were limited by two issues: fiber tolerances and the type of polish on the connectors. Single-mode fiber tolerances for core, cladding dimensions, ovality and concentricity continue to improve. Older fibers simply have more opportunity for higher loss connections.

Many legacy connectors had either flat polishes or original physical contact (PC) polishes with reflectance levels of 30-40 dB. Even the improved super PC (SPC) polishes of the late 1990s with most ST and SC connectors have much greater reflectance levels (45 dB) than the 50-65 dB reflectance levels for today’s ultra physical contact (UPC) and angled physical contact (APC) polishes.

Identifying high loss splices and connectors as well as high reflectance connectors can easily be performed by the OTDR. However if the readings are too high to meet today’s standards or system performance levels, these older terminations may have to be replaced with UPC or APC connectors.

The Chicken and the Egg Question

Is the technology driving the development of improved OTDRs? Or are the users driving their needs? Each group will have their own perspectives. The manufacturers have done a great job at developing smaller, lighter, less costly instruments. They have done so while improving technical requirements: greater dynamic range options, shorter and longer laser pulse widths, increased waveform and data storage, longer battery life, and interfaces for exporting data via Bluetooth or Wi-Fi. At the same time maintaining an instrument that is easy to operate.

OTDRs have also grown from AC powered mainframe OTDRs to handheld mini OTDRs.

The development of modular OTDR platforms allows for greater flexibility to add various optical tools such as power meters, visual fault locators, inspection scopes or other modules for advanced fiber testing, wifi or copper testing.

Test Cables Don’t Last Forever

by http://www.fiber-mart.com

I frequently hear customers complain that although nothing has changed in their fiber optic cable assembly production process, the measured Insertion Loss (IL) and Return Loss (RL) values of their product aren’t as good as they once were. Is something wrong with the measurement equipment? Well, it’s possible but unlikely.

Obviously something has changed. If it’s not the measurement equipment, then it must be either the product or the measurement setup. Over time the production process can become a familiar, perhaps boring, routine. Operators may become less meticulous in cleaning, use polishing film longer than appropriate, or even take shortcuts. Eventually this takes a toll and yield suffers.

Let’s suppose you’ve eliminated this possibility with a clean sweep of procedures and a reset to rigorous production guidelines. Yet the problem persists. A “gold-standard” product is useful at this stage – a “known-good” example of the best of your previous production, carefully kept, with very good IL and RL values recorded. Using your current rigorous procedures, re-measure this gold-standard product. It should still look good. If it doesn’t, read on …

I have written that IL and RL tests on a product cannot be made in isolation. Remember, we are measuring connector loss, and the device under test (DUT) needs to be connected to a test cable (aka jumper cable, reference cable, or test lead). It’s important to note that the quality and condition of test cables have a direct bearing on the measured product’s IL and RL measurements.

Assess the quality and condition of test cables.

Firstly, ensure the test cable’s connectors are clean. Next, take a close look to ensure they are in good condition. Keep in mind that both connectors and coupling sleeves don’t last forever. They will degrade with use, and it’s not just scratches and pits. Sliding surfaces wear out. As the fit becomes loose, alignment will suffer.

How many matings can a test connector undergo before it should be replaced? It would be nice to have a definitive number to work with. However, it’s difficult to give a definite answer as it depends on the type and quality of the connectors and the skill of the operators.

Suppose replacing all the test cables and couplers restores your gold-standard product to the previous good measured values. This is useful information. Take a minute to determine approximately how many matings these particular test cables have undergone. What number did you arrive at? Now you know how many couplings are too many!

Identify a usage limit and determine a replacement schedule.

I propose you set usage limit at, say, half the above number. Weigh the ongoing cost of replacement and time required to replace test cables. How does this compare with the cost if you let products go to the failure stage?

A regime of frequent monitoring of the gold-standard device might help nail down the test cable usage limit. (Don’t do this too frequently, or your gold-standard cable will degrade.) This monitoring regime will help you create a reasonable replacement schedule.

Here’s a helpful tip: If you use the Viavi MAP/PCT system, it can track measurement jumper usage and warn if the cable exceeds a user-defined limit. If you use another test instrument, I encourage you to look into whether it can track usage and provide this type of warning as well.

Implement robust process controls.

Test cables do have a finite useful working life. And this lifespan will vary. For example, one improper mating or cleaning can potentially damage a test cable’s end-face enough to render it unusable.

Implementing robust process controls will go a long way to extend the test cable’s life and identify when it needs to be replaced. As discussed, I recommend:

  • Frequently inspecting test cable end-faces between matings
  • Adhering to good cleaning practices
  • Using a “known-good” cable for troubleshooting

Here’s another tip: Telcordia’s GR-326 specification provides excellent guidance on this topic. It is highly recommended that any cable assembly manufacturer procures a copy and, at minimum, adheres to the requirements of Section 8.0.

If you are seeing degraded IL/RL results with your fiber optic cable assemblies, I recommend you first establish rigorous production controls. Next, follow the guidelines in this article to implement procedures to assess the condition of test cables, track usage, and create a reasonable replacement schedule.

Singlemode fiber and multimode fiber different and selection method(1)

1.What is singlemode and multimode fiber? What is the difference between them?

The concept of single-mode and multi-mode is to classify fibers according to the propagation mode—the concept of multi-mode fiber and single-mode fiber propagation mode. We know that light is an extremely high-frequency (3×10¹⁴Hz) electromagnetic wave. When it propagates in an optical fiber, it is found from theories of wave optics, electromagnetic fields, and Maxwell equations.

When the fiber core has a geometric dimension much larger than the wavelength of the light, the light will propagate in the fiber in dozens or even hundreds of propagation modes, such as TMmn mode, TEmn mode, HEmn mode, etc. (where m, n=0, 1, 2, 3, …).

Among them, the HE11 mode is called the basic mode, and the rest are all called high-order modes.

Multimode fiber

When the fiber’s geometric size (mainly the core diameter d1) is far greater than the wavelength of light (about 1μm), there will be dozens or even hundreds of propagation modes in the fiber. Different propagation modes have different propagation speeds and phases, resulting in delays and widening light pulses after long-distance transmission. This phenomenon is called the modal dispersion of the fiber (also called inter-modal dispersion).

Mode dispersion can narrow the bandwidth of multimode fiber and reduce its transmission capacity. Therefore, multimode fiber is only suitable for smaller-capacity fiber communication.

The refractive index distribution of a multimode fiber is mostly a parabolic distribution, ie, a graded index profile. Its core diameter is about 50μm.

图片1

Single Mode Fiber

When the fiber’s geometry (mainly the core diameter) can be similar to the wavelength of light, if the core diameter d1 is in the range of 5~10μm, the fiber only allows one mode (base mode HE11) to propagate in it, and all other high-order modes are all cut off. This kind of fiber is called single-mode fiber.
Since it only has one mode to propagate and avoids the problem of mode dispersion, single-mode fiber has a very wide bandwidth and is particularly suitable for large-capacity optical fiber communications. Therefore, in order to achieve single-mode transmission, the parameters of the fiber must satisfy certain conditions. Through formulae calculations, for a fiber with NA=0.12, single-mode transmission above λ=1.3 μm, the radius of the fiber core should be ≤ 4.2 μm, ie its core diameter d1 ≤ 8.4 μm.
Because the core diameter of a singlemode fiber is very small, more stringent requirements are imposed on its manufacturing process.

2.What are the advantages of using optical fiber?

1) The passband of the fiber is very wide and the theory can reach 30T.
2) The length of non-relay support is up to tens to hundreds of kilometers, and the copper wire is only a few hundred meters.
3) Not affected by electromagnetic fields and electromagnetic radiation.
4) Light weight and small size.
5) Optical fiber communication is not powered, and the use of safety can be used in flammable, volatile and other places.
6) The use of a wide range of ambient temperatures.
7) Long service life.

图片2

3.how to choose the optical cable?

In addition to selecting the number of optical fiber cores and optical fibers, the optical cable must be selected according to the use environment of the optical cable to select the structure of the optical cable and the outer sheath.

1) Optical cable for outdoor use When loosely buried, it is better to use loose-sheathed cable. When overhead, a loose PE cable with a black PE sheath with two or more ribs can be used.
2) Optical fiber cables used in buildings should use tight-fitting optical cables and pay attention to their fire-retardant, toxic and smoke characteristics. The type of flame-retardant but smoke (Plenum) or flammable and non-toxic type (LSZH) can be used in the pipeline or in forced ventilation. The type of flame-retardant, non-toxic and non-smoking (Riser) should be used in the exposed environment.
3) When vertical or horizontal cabling is installed in a building, it can be used when using tight-fit optical cable, distribution optical cable or branch optical cable that are common in the building.
4) Select single-mode and multi-mode optical cables based on network applications and optical cable application parameters. Usually, indoor and short-distance applications use multimode optical cables, while outdoor and long-distance applications use single-mode optical cables.

4.In the connection of optical fibers, how to choose different applications of fixed connection and active connection?

The active connection of the fiber is achieved through a fiber optic connector. An active connection point in the optical link is a clear split interface. In the choice of active connection and fixed connection, the advantages of fixed connection are reflected in lower cost, light loss, but less flexibility, and the active connection is the opposite. When designing the network, it is necessary to flexibly select the use of activities and fixed connections according to the entire link situation to ensure flexibility and stability, so as to give full play to their respective advantages. The active connection interface is an important test, maintenance, and change interface. The active connection is relatively easy to find the fault point in the link than the fixed connection, which increases the convenience of replacement of the faulty device, thereby improving system maintenance and reducing maintenance costs.

图片3

5.Fibers are getting closer to user terminals. What do you need to pay attention to when it comes to the meaning of “fiber to the desktop” and system design?

“Fiber-to-the-desktop” in the application of the horizontal subsystem, and the relationship between copper and copper cable is complementary and indispensable. Optical fiber has its unique advantages, such as long transmission distance, stable transmission, free from electromagnetic interference, high support bandwidth, and no electromagnetic leakage. These characteristics make the optical fiber play an irreplaceable role in some specific environments:
1) If the information point transmission distance is greater than 100m, if you choose to use copper cable. Replicators must be added or network equipment and weak rooms must be added to increase costs and hidden troubles. Using fiber can easily solve this problem.
2) There are a large number of sources of electromagnetic interference in specific work environments (such as factories, hospitals, air-conditioning rooms, power equipment rooms, etc.), and optical fibers can be operated stably without electromagnetic interference in these environments.
3) There is no electromagnetic leakage in the fiber. It is very difficult to detect the signal transmitted in the fiber. It is a good choice for places where the security level is relatively high (such as military, R&D, auditing, government, etc.).
4) The environment with high demand for bandwidth has reached more than 1G. Optical fiber is a good choice.

There are many differences between single-mode fiber and multi-mode fiber, and the selection method is not the same. Let’s talk about it today. For more details, please keep an eye on Singlemode fiber and multimode fiber different and selection method(2).

hould You Choose Copper or Fiber Patch Panels?

by http://www.fiber-mart.com

There is no doubt that patch panels are extremely important in cabling systems. You simply cannot have a business or home network (no matter how big or how small) without the use of patch panels. It has been said that patch panels are basically the “nerve center” for a cabling network, and they allow you to terminate cable elements. They also allow the signal to be connected to the final destination.
Patch panels are so critical to a system that if anything goes wrong with them, the entire system may fail. That means that they are very important to your networking system! Patch panels also play a big role in the administration of the telecommunications network. Some believe that they are the absolute only way to successfully transfer lines from one office to the next office.
Since they allow such easy management of cables, it makes sense to choose patch panels carefully. There are copper patch panels and fiber patch panels available. If you use both, it is best to separate the cabling made out of fiber from cabling made from copper. But what if you want to choose between copper and fiber patch panels? Which kind is best?
First, you should know that patch panels are used in fiber cabling networks as well as copper cabling networks. So is there a difference between these two types of cables as far as performance is concerned? Well, most professionals don’t see any differences. But others believe that the fiber patch panels are better, even though they are more expensive than their copper counterpart. In fact, they can be up to 40 percent higher in cost.
When it comes to copper patch panels, each pair of wires has a port. Fiber patch panels require two ports, but no hardwiring is needed. Fiber patch panels are a lot easier to install because of this. The fiber is fed through a coupler.
In addition, most professionals are in agreement that fiber is a lot faster than copper patch panels. Both types of patch panels must perform according to the same TIA/EIA standards that are needed to produce speed and signal performance for the rest of the cabling network.